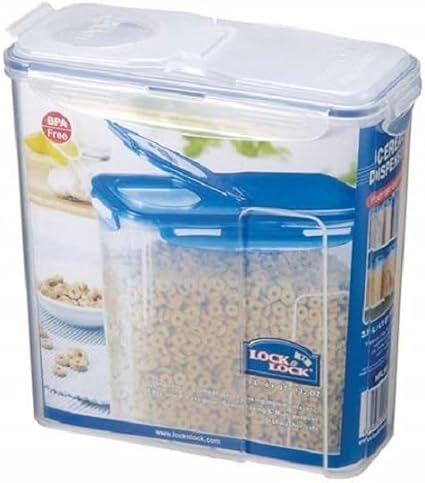
FLOUR & Other Dry Storage: My “system” currently uses some “lock tight” Containers intended for Cereal, but that hold a 5 lb bag of Flour. This started when I was still able to manage the Fresh Milled Flour process so I could break up the steps that allowed me to fit it into my version(s) of 10-20-30 minutes bits as my work and family time allowed.
To see the closest match I could find, this is an affiliate link, but it is used for illustration in this case. I bought mine from ALDI years ago and you may also find them locally at a better price, https://amzn.to/4v5J79R
Humidity & Moisture Control: Every few years I buy a 10 or so pack of 50 gram Moisture Absorbers. When you live an area subject to humidity and other weather related issues, and your apartment is only 700 square feet, ideal storage is NOT Always available. I also keep & use reuse a supplie of 5g, 10g, and 20g for use the dry herbs & spices I buy in bulk – small for the “daily use” bottles and the larger as needed for the “back up storage” And, yes, in those 1 lb bags of dry yeast too. ncidentally EVERY Dry Ingredient and the mixes I make up in advance all are stored in air tight containers with Moisture absorbers.
I leave Flour, sugar, rice in their bag, put the bag, place it into the the Air Tight containers along with appropriately sized Moisture Absorbers. This habit means I pretty much never has to worry about humidity. Since barometric pressure is out side my control, I don’t bake on “weather headache” days. Combining air tight containers with moisture absorbers and a dedicated selected size dry measure
o see the closest match I could find, this is an affiliate link, but it is used for illustration in this case. https://amzn.to/4bLoWqe
Last but not least, each container has a “dedicated” dry measure cup in the size most often needed. the exception is flours used in breads. those has two, a one (1) cup & a half (1/2) cup. Vital Wheat gluten has a eighth (1/8) cup. These stay in that container so ALL measuring from that ingredient is consistent.
Bulk yeast has the spoon that came with the KBS/Keepeez bread machine. Again, consistent measuring.
This also means less cleanup most of the time. Measure the dry ingredient into a pan or bowl, and back into the container for next time.
In response to a question about how to get a darker top crust, in 2026/Jan/04 John DeFields wrote: (Thanks to John for permission to share )
“I’m not sure what model you have, but if it has a fruit/nut dispenser remove it unless you need it for a recipe. This allows for better air circulation at the top of the loaf.”
Note: Sample Loaves were egg-washed to enhance appearance
How to Freeze and Reheat Rice Wheat’s KISS (Keep It Simple Sweetie) takes almost as long to type this it does to “get it done”
may continue affliiate links to “show” items mention in this entry.
Using Electric Pressure Cooker (mine is the Ninja Foodi OP400) Prepare rice in multiples of 1 cup uncooked per EPC directions When done, Fluff vigorously Set Aside 1.5 cooked for “tonight” Since I cook “Pot-In-Pot” move remainder to counter to cool as soon as room temp, portion into flip flap sandwich bags Stack on a flat try and move to fridge to cool overnight Next day, place bags in a larger zip bag (The Greenie In Me reuses gallon freezer zip locks for each flavor – basmati, jasmine, etc)
Defrost as needed, heat in covered dish in micro wave. Why you ask covered? Because it keeps it from drying out and IF it was cooled properly will not get mushy/over cooked in texture.
OR break it up, and lay out on sheet pan to prep for “fried rice” which works best if the rice has been dried a pit.
For those who prefer more complicated “recipes” How to Freeze and Reheat Rice https://www.simplyrecipes.com/how_to_freeze_and_reheat_rice/
TIPLET: Question: My machine shows size choices of 500g i 750g i 1000g how do I know which size to choose fro recipes choices of 1 lb, 1.5 lb, and 2 lb.
RULE OF THUMB: keep in mind that the amount of flour that best suits a particular size is a range, Use the machine size selection closest tot he amount suggested in your recipe of choice. I.E. 750 grams is approximately 1.65 lbs.
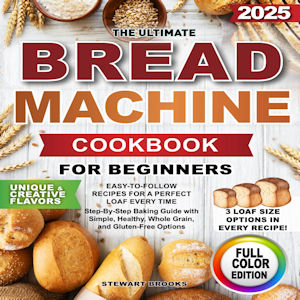
Ultimate Bread Machine Cookbook for Beginners, The Brooks, Stewart (Kindle copyright 2004) https://amzn.to/3NNnIAZ Convert not necessary – All recipes contain Imperial & Metric
The Image Below SHOULD NOT BE USED FOR DELAYED START I don’t do Delayed Start – Use at your own risk but it “works for me
Order to “Load Pan” First In = Bottom of Pan 1. Liquids 2. oils 3. (Yeast controls) Salt, Sugar 4. Flours 5. Vital Wheat Glutne 6. Yeast/Leaveners (Baking Powder,
NOTES: Sourdough. IF you are using “wet” sourdough, Sub 1 cup of Sourdough for 1 cup of flour AND REDUCE other Liquid (Milk/Water/Juice) by 25 % BE SURE TO MONITOR HYDRATION during 1st 10 minutes of starting machine.
7: Additives. Read Recipe instructions a time or three until you are sure what it is asking you to do. USUALLY the Additives beep is After the first Rise/Ferment and just as the second Stir occurs. NOTE: I also have chosen NOT to use the automatic thing for additives. I am fussy and it seems that EITHER it fails, OR, it dumps the ingredients, but as “ugly clup” so my preferences is to be hands on and roll in the additives after removing the paddle – time chart math may be required.
Misc to be explained, how to “time” when you need to come back to the kitchen to add things.