For Nerdy Bread Machine User Entertainment. Probably not something most should try at home and definitely not before the end of your warranty… And of course we can all appreciate the Cat Comments
https://www.youtube.com/watch?v=2FWpr5MkLco&t

Wheat Wrote WHAT?!Whatever Is On My Mind – Links for things I use: InMySmall Kitchen to EnjoyTheMaking |
||

| ||
For Nerdy Bread Machine User Entertainment. Probably not something most should try at home and definitely not before the end of your warranty… And of course we can all appreciate the Cat Comments
https://www.youtube.com/watch?v=2FWpr5MkLco&t
I am a bit sad today: I have been a huge supporter of KBS. And, as long as I can otherwise nurse this baby along I will. Meanwhile I will likely continue to post the more generic notes about my use of the KBS and other bread machines here.
One of its selling points is the two year warranty.
We have been having an issue for the last few loaves so I began the (TEDIOUS) Process of contacting amazon after repeated no response from KBS.
In round 1: I was given an 800# and email for a local cleaning company located Oceanside California (KBS-Services.com_ Hard to say who was more confused – the guy who answered the phone or me – but he was very polite and I thanked him for that courtesy.
Round 2 was a referral to Seller Assistant: Amazon acting as go between. AMAZON’s process to assist you with reaching a seller.
Round 3: Sent Message to Seller… Here is the response we received: Pretty much SOL this is the 2nd time this month an AMAZON did not deliver as promised and AMAZON is not back it up other than a partial refund offer (we will see if that helps. ) Do as they say Caveat Emptor – Because as they also say If it looks too good to be true (2 yr warranty on a product from a manufacturer whose other OEM usually die at 6 months) It probably is (too good to be true.
Dear xxxxx xxxxxxx
We are sorry to let you know that your message(s) associated with Order ID 112-xxxxxxxxxx cannot be delivered. The seller associated with your order or inquiry has left the Amazon store or is no longer able to receive any further email communications.
For additional guidance, consider visiting the Amazon Customer Service Homepage for recommendations by topic: http://www.amazon.com/hz/contact-us/foresight/hubgateway
We hope our online resources meet all your needs.
Warmest Regards, Amazon.com
The model I currently own and use is the smallest, MBF-041 purchased in June 0f 2023. It makes only 1 and 1.5 lb loaves, although I routinely stretch the “Leaven Dough” to quantity more suitable to 2-3 lb loaves.
IF you see an error please let me know so it can be corrected. It has some seemingly unique menus and I will be adding more details about that to the post specific to the MBF-041. as time and energy allow.
Note: Amazon links in the chart below are affiliate links. If you make a purchase after following one of those links, I may receive a small commission. This does NOT increase your costs.
updated 2024-02-12
| KBS | MBF-041 19-n-1 | MBF-016 19-n-1 | MBF-010 17-n-1 | MBS 011 17-n-1 | MBF-013A 17-n-1 |
| Loaf | 1 & 1.5 lb | 1.5 & 2 lb | 1.5 & 2 lb | 1.5 & 2 lb | 1.5 & 2 lb |
| Pan | Square Tube | Rectangle | Rectangle | Rectangle | Rectangle |
| Heat | Double Coil | Single Coil | Single Coil | Double Coil | Single Coil |
| – | 550 Watts | 650 Watts | 710 Watts | 710 Watts | 710 Watts |
| Nut 1 | No | No | Maybe | Yes | Yes |
| 1 | Soft (Basic) | Soft | Light | Yes | Soft |
| 2 | Sweet | Sweet | Sweet | Sweet | Sweet |
| 3 | Natural | Natural | Yeast | Natural | Natural |
| 4 | French | French | French | French | French |
| 5 | Whole Wheat | Whole Wheat | Whole Wheat | Whole Wheat | Whole Wheat |
| 6 | Quick | Quick | Quick | Quick | Quick |
| 7 | Sugar Free | Sugar Free | Sugar Free | Sugar Free | Sugar Free |
| 8 | Multi Grain | Multi Grain | Multi Grain | Multi Grain | Multi Grain |
| 9 | Milky Loaf | Gluten Free | Milk Toast | Milky Loaf | Milky Loaf |
| 10 | Cake | Buttermilk | Cake | Cake | Cake |
| 11 | Raw Dough | Bread Dough | Dough Knead | Raw Dough | Raw Dough |
| 12 | Leaven Dough | Pizza Dough | Dough Ferment | Leaven Dough | Leaven Dough |
| 13 | Jam | Pasta Dough | Fruit Jam | Jam | Jam |
| 14 | Bake | Leaven Dough | Bake | Bake | Bake |
| 15 | Yogurt | Cake | Yoghurt | Yogurt | Yogurt |
| 16 | Gluten Free | Jam | Gluten Free | Gluten Free | Gluten Free |
| 17 | Rice Cake | Yogurt | Ferment | Ferment | Rice Cake |
| 18 | Stir Fry | Bake | Stir Fry | ||
| 19 | Ferment | Custom Mode | Ferment | ||
| 9″D x 10.9″W x 10.1″H | 11.2 x 15.8 x 16.1 inches | 15.7″D x 11″W x 16.1″H | 9.8″D x 13.6″W x 12.2″H | – |
updates: 2024-02-05 2024-02-05
Link: https://wheatcarr.com/2024/02/04/kbs-model-menu-comparison/

Proofing Yeast For Bread Machine:
In a small glass , combine
1.5 oz 100F Liquid.
1Teaspoon Sugar
Add 1 Teaspoon Bread Machine Yeast
If Yeast is happy – it should double within -5 to 10 minutes

Did some nominally updated, typos fixes and such –
cause Peter Cotton Tail will soon appear on the horizon…
No matter what you call’em…Pampushky (Ukraine Christmas Eve) or Paczki (Polish – Fat Thursday – February 12 2026) Beignet (NOLA Fat Tuesday Feb 17 2026) they are all Jelly Donuts and best served when you can get them.
If you don’t use whole cow’s milk, butter and/or lard, do not make these you will be disappointed.
Equipment:
You will need a Bread Maker/Machine with at least 1.5 lb loaf capacity.
Better would be 2 lb, but we all work with what we have.
Choose Dough/Raw Dough (KBS) cycle

Dough Ingredients
Note: It is always best to load the ingredients in the order listed
2/3 cup whole milk
(warm approx temp 90-110)
2 1/4 teaspoons Bread Machine/Instant Yeast
1/8 cup Sugar
3 eggs, beaten
3 tablespoons butter softened
Mix together BEFORE adding to liquid
2 teaspoon Vanilla Powder
(or mix liquid with wet ingredients above)
1/8 cup sugar
2 1/2 cups flour
1 teaspoon salt
2 teaspoon Vanilla Powder
(or mix liquid with wet ingredients above)
1 teaspoon pumpkin pie spice
(or if you must apple pie spice)
Run Dough (KBs Raw Dough) Cycle on Bread Machine
all rising will be done outside the box/machine
When Dough/Raw Dough cycle is complete
Turn out onto lightly flour board and knead a bit (adding flour if necessary) until you have a smooth, mostly non sticky dough
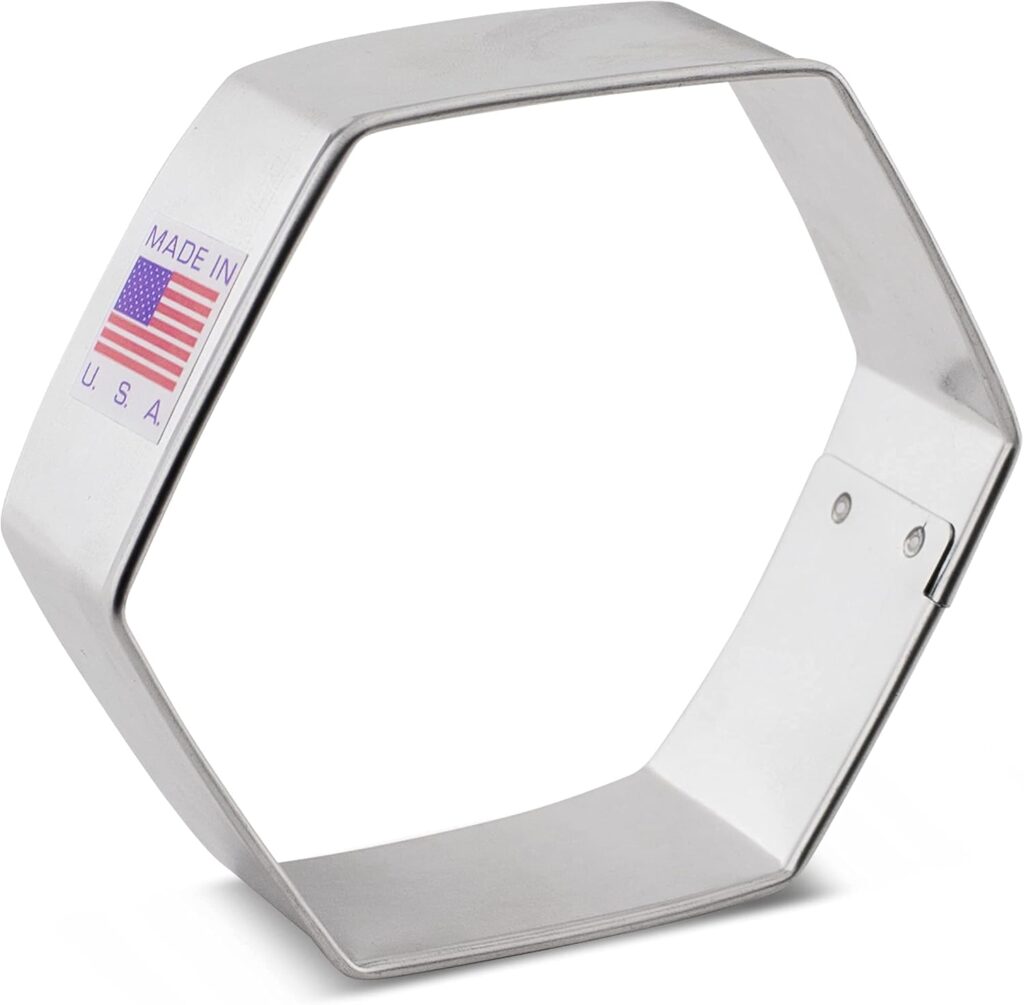
Because I can be lazy, I like to use the hexagon shape cutter. The shape rounds a bit when baking, and since the shape will inter=lock, a lot less combining and rolling out. so as not to waste any dough. The 3 inch size is also nice for Sandwich buns.
Roll out to about 1/2 inch thick cut into 3 inch circles for full size – Most will have this size already in your kitchen (and I do too) but I prefer the Hexagon.
Added 2026-01-27: The set I have is not currently available. This is an affilate link to one of the “Single” 3 in Hexagons, made in the USA sold by Ann Clark’s company in Vermont on Amazon
A 3 – 3 1/2 inch round cutter is best so that it bakes/fries evenly but if you want to try some other shapes, these hexagon cutter work, Hexagons are helpful in minimizthe the need to combine and re-rollout scraps so as not to waste. (reminder, some but not all my links may be affiliate type which may pay me a small commission, but do not add to your cost.

Recombine dough to make more as needed –
Place one parchment lined or lightly greased pan(s) about 1-1.5 inches apart
Cover and allow to rise to about double in size
Bake in preheated 400f degree oven (AF/Convection about 385F) until lightly browned
Immediately brush with melted butter and roll in sugar
Filling
Allow Donuts to cool about 10-15 minutes,
Then using a pastry bag and longish tip,
inject with the Jam/Jelly/Curd of your choice
Frugal Note: Got some Jelly or Jam that needs to be used up? Thin it a bit with water and use as filling in your donuts.
DO NOT OVER FILL
Or Rinsing tip between, use sandwich size baggies with corner cut off and make a selection of flavors.
Alternate “Two Bite”:
Divide Dough, roll out TWO circle and use Hunky Bill’s Big Pierogi maker
DO NOT OVER FILL
I prefer parchment paper to greased sheet – but your choice
notes scribbled in the Margin
FREEZE before rise, allow to defrost & rise before baking.
Most good quality prepared pie filling – mashed to paste – works
If deep fry use LARD not Veg Oil.
Aside, yes I have a recipe for doing it in a mixer and hand kneading, but why own a bread machine (mine has a different exterior design, otherwise same as shown) if you are not willing to let it save your arthritic wrists from pain.
As always,Amazon Links are to identical or curently available versions of things you will find InMySmallKitchen if you were invited to visit our home.
updated: 2023-Dec-20
update: 2026-Jan: Added a new brand of hex cutter. Fixed some typos, etc.