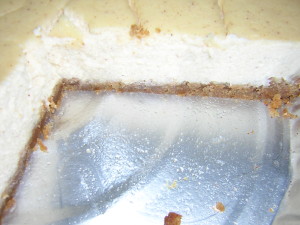
 I probably should start by mentioning I am have chronically low blood sugar (hypoglycemia) and even more chronically low cholesterol. TH is diabetic, so we usually only allow ourselves a small slice in the evening –
Basic Cracker Crust:
nicely fills a 9 inch pie pan or the bottom of a 10 inch spring form
Ingredients:
1.5 cups finely crushed Graham Crackers or “Digestive Bisquits” or some cookies –
if you don’t get them fine enough – the crust won’t hold together – I have not had good experience with cookies with chips that melt (they burn) and nuts (can’t hold together and often to coarsely ground) so suggest saving chips and nuts for filling and toppings
Important quote: “If you won’t use butter, I can’t help you” Anthony Bourdain
6 Tbl Butter – Melted (lightly salted is fine – if unsalted, that will be fine too
1 Tbl Butter – Softened – use to grease pie or spring pan – not needed if you make the cupcake variation using cupcake papers.
—-
1/4 cup Honey – I tend to like things less sweet so use Honey rather than sugar because it takes less to get the same amount of sweetness – this also helps keep TH’s blood sugar in acceptable limits.
Someday I hope my Bee Keeping friends will send me some of their “flavored” honey to try for flavor variations. But for now, I just use a plain honey from a local keeper of bees.
—-
—— Your Choice COMPLETELY Optional —–
1/2 tsp of the flavor of your choice
My opinion is that the world is a better place with the addition of ground Cinnamon or a rich dark Cocoa powder or both.
— other choices might be – Vanilla Powder – and a recent addition to my flavorings – True Lemon, Lime & Orange Powder – These are great for when the filling is also Citrus flavored.
___
1. Generously Grease Pan of choice
2. Combine Cracker crumbs, Butter and Honey until all crumbs are moist.
3. Press into the pan of choice (pack it as tightly as possible)
4. Bake at 350 F – 8 minutes
5. Remove from oven and “smash it down” while still hot
6a. Use it today: Return to oven as quickly as safely possible and bake an additional 3 minutes
7a. Set aside – okay if it cools and if you like can also be refrigerated if you needed to get the crust done as a partial bake ahead.
8. Prepare Filling and bake according to filling directions.
6b. Freeze for later: allow to cool completely with pan on a rack –
bag/wrap in plastic and store in freezer up to 1 month. (more works, but not sure how it will affect final flavor.
I often make several and “stack” them for storage
cool in refrigerator until well chilled, wrap tightly
7b. Remove from freezer and allow to completely defrost.
=== if you plan a “no bake” filling like chocolate mousse – Preheat over to 350 F and bake about 3 minutes.
8. Prepare Filling and bake according to filling directions.
=== if you plan a baked filling – no pre bake needed.
Notes:
Fully prepared can be tightly covered and stored in refrig for several days without adverse effect on flavor
If you plan to freeze the shells, it is okay to omit the additional flavor and then use the same smaller amount to lightly dust the shell prior to adding filling. Lightly dust should be no more than the amount you would have added to the shell before baking .
Crust can be baked on a sheet pan and while still warm cut into shape to line the bottom of a cupcake paper or even smooshed into the cupcake liner and baked in your cupcake tin.
A neat dessert sampler can be made using the mini-cupcake papers and tins – with the basic recipe and then flavor dust – topped by the flavored filling (yes recipe to come)
again these freeze well, take less than an hour to defrost and the minis are also great semi frozen with a dollop of ice cream, or gelato.
last edited 2015-Sep-06

I did not forget about the filling
http://wheatcarr.com/passing-thoughts/cheese-cake-pie-filling.php