» Currently browsing: Kumihimo
June 25th, 2016 at 12:45 pm »
Comments (1)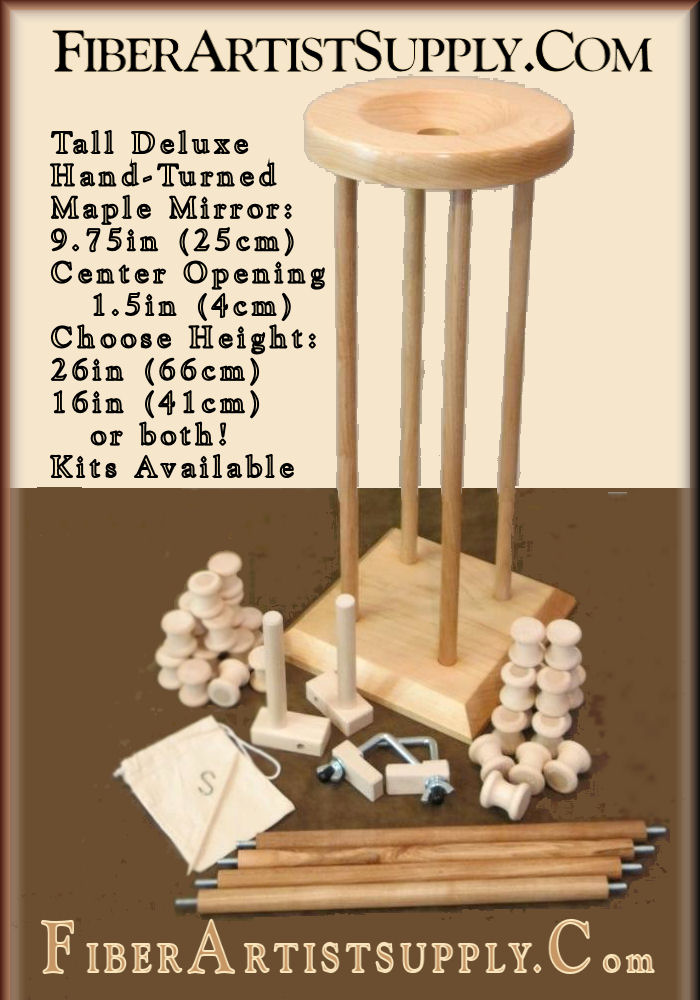 The purpose of this article is to share a starting point of the information necessary to make the best possible investment – time or money – in your choice of braiding equipment.
Let me make it clear – There is nothing wrong with using a disc or improvised or self made braiding equipment. If that is what is currently in your budget. Many of us have; some including me, still do use both MaruDai and other types braiding stands, just remember flat tops are not Marudai and your results may not be of the quality you hope to achieve. And, I DO recommend you “buy a book” and try with improvised equipment as the first step in your research.
In their beginner books Carey & Owen give ideas for improvised equipment – and see if you enjoy it. the braids will not be perfect or wonderful, that comes with better equipment and practice. Remember: There are many types of braiding equipment not every stand is Japanese in style, or evea a MaruDai and it cannot be said often enough – NOT all braids are Kumihimo.
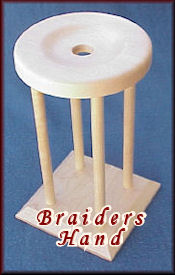
What makes it a Marudai and not “just” a braiding Stand? Whether you know the Japanese name: Hakomi or the often used “English” words like Scoop or Well or Bowl …
The Hakomi Matters.
Without a Hakomi it is not a Marudai
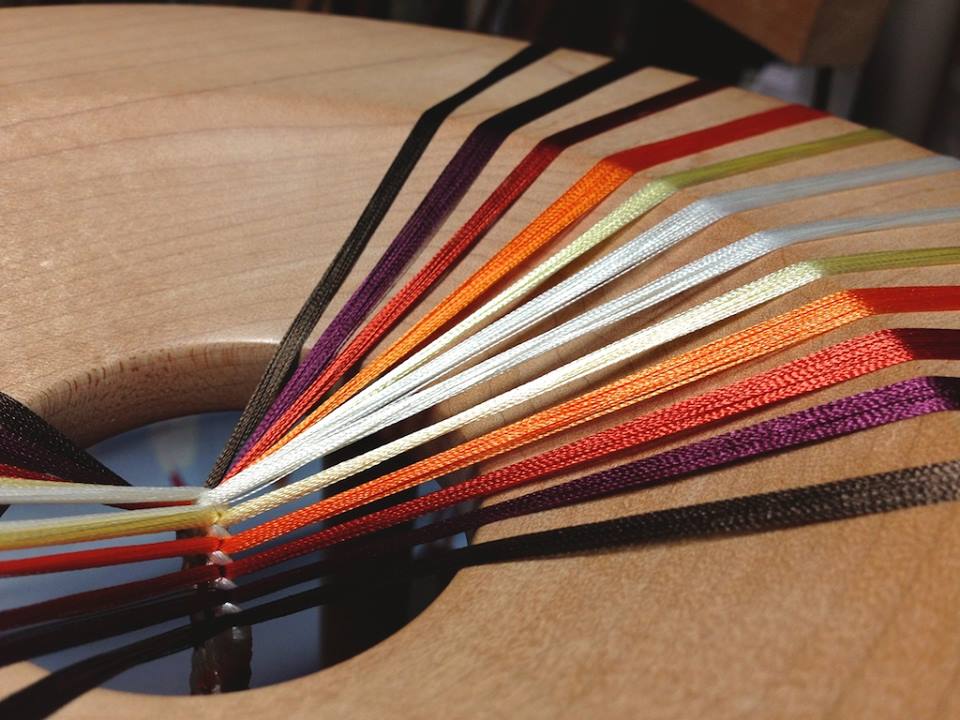
 Hekomi Side View
courtesy: Michael Hattori
Why is the Hakomi critical. Perhaps the best answer can be found in two message threads in the FaceBook group: Kumihimo Braiders International in July of 2014 when Michael Hattori was asked, as part of the discussion related to his “announcement:” of his YouTube video and shared with his specific permission:
.. how important is the well in a mirror? I bought one without a well ….
And Michael responded: … we are talking about basics.
The “well” is one of my soapbox topics, and you asked for it! The well is one of THE most important features of a marudai, and in my opinion, any marudai without one should not be used. Its purpose it to provide a “free” space where the threads do not touch the marudai; this allows the threads to fall naturally into place. The depth of the well also causes the threads to angle down toward the point of braiding – another feature which helps the braid to form correctly.
If your mirror is completely flat, the threads move in a straight line to the point of braiding; this means there is friction on the thread almost all the way to the point of braiding, which impedes the formation of the braid. If you are doing just a Yotsu-gumi, you can get away with it, but once you start working with larger numbers of tama, it is absolutely essential.
I’ve said it a million times before, and I’ll say it again: kumihimo has been around for centuries, and the Japanese are known for their ability to refine things to levels unprecedented elsewhere in the world. So, you can bet that every single design aspect of a marudai has been thought out and trialed over hundreds of years and nothing has been left to chance.
It is the folly, unfortunately, of many people who try to make their own kumihimo equipment that this is not taken into consideration, and essential things such as the well are left out.
My advice is to either get a marudai with the well, or find someone who can put one on the marudai you have, paying very close attention to the width, depth and curvature of it.
Sorry for the novel, but you did hit on one of my biggest pet peeves about homemade kumihimo equipment! But I hope I’ve helped you to understand the importance of using a properly made marudai.
2014-07-28 in KBI, Michael shared photos and this additional thoughts.
For … anyone else interested in the “why” of the well on a marudai: a picture is worth a thousand words.
Many homemade marudai are missing this essential feature. These photos show the downward angle and the all-important free space created by the well, both of which allow the braid to “breathe” and form naturally at the point of braiding. The problem with a completely flat mirror is that the threads are then subjected to friction almost all the way to the point of braiding, which can impede the correct formation of the braid; the more tama you are using, the more important this feature becomes.
The marudai has been around for several centuries, and with the Japanese penchant for ultra-refinement, you can bet they haven’t missed anything! So, in my humble opinion, if it ain’t got a well, it ain’t a marudai!
Michael has established the minimum criteria for “what makes it a MaruDai, Well, exactly” – it does not mean other equipment cannot be used, it is just not a MaruDai – Like Michael Hattori I agree if it lacks a Well, then it is not a MaruDai, it is a Braiding Stand – and that tool also has an honorable history, but its roots are not in Japan.
I understand personal budget issues, so like many, it was quite a while before I could afford a Marudai that would “works best for me”. Well worth the wait. That does not mean my braiding stand(s) have not been used, and each as a personal history – only that I always knew my traditional braids would be so much better when I had one.
Meanwhile, for some of the more non-traditional work, beaded braids, wire word and of course – occasional side trips into Victorian Hair work, the flat top continued to be adequate to those tasks.
Thinking about making your own?
Michael Hattori’s measured drawing can be downloaded from my Kumihimo Links Page
added 2015-Jan-09: Not sure if it is mentioned in the Measured Drawing PDF – there are different schools of thought on the height – as was recommended to me (and reinforced by learning the reality the hard way) the top of your mirror should be about the same when you arms are at straight down your side from shoulder to elbow and your forearm is at a 90-95 degree angle to your body. With good back support, this enables me to braid for longer periods
Want to chat about this and related Jewelry & Accessory Making? Join us on FaceBook at: Braids Beaded Kumihimo & More with many thanks to Makiko Tada, Jacquie Carey, Michael Hattori, Carol Miller Franklin, Maryse Levinson, Shirley Berlin, Tim Hale (FiberArtistSupply, Carol Haushalter (Carolyn910), Janis Saunders (BraidersHand). Anita Clark and dozens of others for their permission to include their thoughts and illustrations. Not to mention their decades of patient willingness to answer all my questions about the details and delights of Kumihimo and all braiding techniques.
originally published (and still shared) via ItsAllJustString.COM – Kumihimo and Braiding
Marudai’s I have used and happily recommend: *click for larger image in a new window”
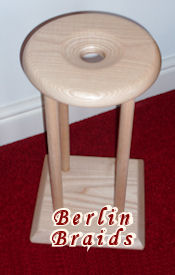
Berlin Braids
|
|
BraidersHand
|
|

FiberArtistSupply
|
These books will be valuable to you even if you decide to stick with the Disc. There are many “details” of braiding that will better enable you to take the step from Disc to Dai
June 3rd, 2016 at 06:19 am »
Comments (0)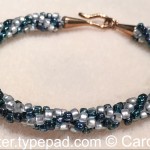 Kongoh Gumi is one of the easiest and most versatile of braids. One of the variations that are invaluable to the Jewelry and accessory braider – with or without beads is understand and use the the S & Z twist methods for design purposes.
After reading the latest entry to Carolyn910’s blog on S & Z and how to reverse the twist within a braid, I did the “stare & compare & converse” which led to a few hours, using different stringing materials – each size of 4 sizes S-Lon cord – quadrupled floss – Asian knotting cord – 2 sizes of Satin Cord – and 2 sizes of para type cord. and 1 of micro.
In Comprehensive Treatise of Braids Vol VI: Kumihimo Disk & Plate by Makiko Tada, the instructions on pages 16 & 17, do not suggest this step. The result (most apparent visually and tactilely) without the flip was a less refined point in the turn.
Likely “okay” if working a fully beaded braid, but noticeable (if you look closely at the illustration of actual braid, you can see the small dent. I would imagine this might be easy to fix by steaming if one were working the braid using bundles – or in the fully beaded braid – the extra step of massaging the the braid I keep reading about.
Mentally, the “flip of the disc” seemed to reinforce the “change of direction” – making a sharper point and so I did (a lot) less unbraiding – so I really thing it is one of those “good habits” that will save you time and energy and produce a better finished work – with less aggravation during the process.
The only thing I might have worded differently is to say to mirror the threads when changing the direction of the spiral. – it was confusing to me since in most photo editing software flip and mirror function differently.
Now back to a day of doctors, PT and studying software, all much less fun than a few hours of braiding as an escape from silly software nonsense (still working on the web store upgrade)
When it comes to braiding, like my Momma used to say:
The Devil Is ALWAYS In The Details
There is certainly a great deal more details of the How To for S & Z Twist for the Disc & Plate braider and jewelry and accessory maker, there are few blogs better so be sure to read and learn at
Carolyn910’s Topcenter Kumihimo Disc & Plate for the rest of the story
Wheat
http://www.EnjoyTheMaking.com
P.S. Thanks to Carolyn for permission to share her image for this blog commentary
P.S. Jr: PDF Link to BeadSmith Z Spiral Instruction included with their disc,ItsAllJustString.com Braiding Resource links at: http://itsalljuststring.com/index.php?main_page=index&cPath=160_165
April 8th, 2016 at 07:47 am »
Comments (0)Inspiration and Tutorial as such lofty words. Sometimes too much so… but they also often “fit” even when said Tutorial is really, as often happens in beaded braiding, nothing more that a set up diagram, a smidgeon of materials used, and a stringing order.
So a bit of history – I am “first” a “Marudai braider” – several decades ago I started with braiding stands and the limited information available in books like the Mark Campbell classic on Victorian Hair Braider.
It is said there are two types of artisan craftsmen and it is especially true in fiber work. There are Process & there are Project –
I am very much a Process person. Working with fiber is, for me, something soothing to my soul. There really is almost no part of the process I do not enjoy – and that one thing is not really a fiber thing – I just don’t like the fume headache that comes with glue –
I also recognize how very lucky I have been beginning as a toddler learning crochet from the “cookie lady” (a neighbor) to today when I have access to wonderful master craftspeople – “raised in the fiber tradition of sharing knowledge” for the good of the craft.
I also think of myself as lazy – so will spend hours, days, weeks, and one case unrelated to fiber crafts or food – finding a way to do it more easily.
There is also more than a little OCD in my quest for knowledge and understanding How It REALLY Works – I blame my parents for that – Other mothers may have preached about clean underwear in case you were in an accident, but valued knowledge – a step past “an education”.
Knowledge is something that only God can take away from you –
once you learn “basic skills” whether that is a beading stitch or a braiding structure – you are freed from the choices of others in the final look of your work.
Of course there are considerations about what and how to share. Still, given my history in the independent design community (few have been removed from as many “craft” groups as I for asserting a defense of the limitation of copyrights and thus doing what I can to protect the intellectual property of self publishing authors – I am quite careful – keeping the kind of copious notes ( learned the importance of that when dabbling in law classes ) so do not publicly share unless I really feel confident about my ethical and moral position
So where does that leave me. Well if I had to choose my greatest super power – it would be not knowing it all, but being willing to look dumb and ask for help. No one really learns anything if they pretend to know it all .
Second to that is knowing where (who or book) “off line” to look for accurate information. So my boring habit of referring people to the books that are, in my never humble opinion, the best resource.
I am also a great proponent of ( and shall miss Jamie, Adam & the crew) of busting InterMyths.
This group, Braids Beaded Kumihimo & More is intended to be a study group where you can, if you wish learn some basic braids. Unfortunately (again IMNHO) the first InterMyth in need of busting is there is such a thing as “the standard Kumihimo braid” –
I do not mind (never have) that some are going to find Kongoh Gumi to be all they want in their skill set – it is after all, Kongoh gumi is likely most “bead friendly of braids” Lord knows given the range of seed colors and shapes available – one could spend years creating varied surface design.
But there are others, some Japanese in origin and some from other ethnic fiber cultures that are not – so maybe the real first myth to be busted is
“While all kumihimo are braids, not all braids are Kumihimo (Japanese) in origin.
Enjoy the Making
Wheat
P.S., over the coming months I will be sharing my choices for “Bead Friendly Braid Structures” and developing the set up and steps to make them on a disc (and maybe some on plate) Hope you will consider joining us at: Braids Beaded Kumihimo & More
March 10th, 2016 at 11:30 am »
Comments (0)
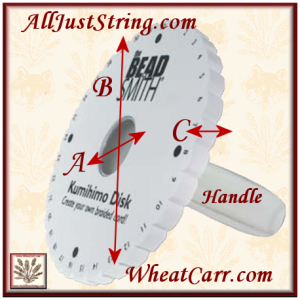
ID=A – Inner Diameter OD=B – Outer Diameter HT=C – Height / Thickness
| Brand Name |
SRP* |
Size |
Handle
Fit |
Center_A
ID_Inches |
Center_A
ID_MM |
Disc
OD_Inches |
Disc
OD_CM |
Disc
HT_Inch |
Disc
HT_MM |
| BeadSmith DD * |
5.00 |
Large |
yes |
1 1/4 in |
35 mm |
5 13/16 in |
15 cm |
0.75in |
20mm |
| BeadSmith DD Mini * |
4.50 |
Small |
yes |
1 1/4 in |
14 mm |
4 3/16 in |
10.6 cm |
0.75in |
20mm |
| BeadSmith SD * |
3.38 |
Large |
yes |
15/16 in |
14mm |
5 13/16 in |
15 cm |
0.375in |
10mm |
| BeadSmith SD Mini: * |
3.18 |
Small |
|
15/16 in |
14 mm |
4 3/16 in |
10.6 cm |
0.375in |
10mm |
| Beadaholique: |
5.49 |
Large |
no |
7/8 in |
12 mm |
5 7/8 in |
15 cm |
0.3125in |
8mm |
| Beadalon |
3.19 |
Small |
no |
15/16 in |
14mm |
4 1/4in |
10.8 cm |
0.375in |
10mm |
| Beadalon |
3.99 |
Large |
no |
15/16 in |
14mm |
6 in |
15 cm |
0.375in |
10mm |
| Dazzle-it: |
3.99 |
Large |
no |
15/16 in |
12 mm |
5 7/8 in |
15 cm |
0.3125in |
8mm |
| Fire Mountain |
3.52 |
Small |
no |
7/8 in |
12 mm |
4 1/4in |
10.8 cm |
.3125in |
8mm |
| Hamanaka: |
10.00 |
Large |
no |
15/16 in |
14mm |
5 7/8 in |
15 cm |
.4375in |
12mm |
| Sally Battis: |
8.00 |
Large |
no*** |
1 1/4 in |
35 mm |
5 1/2in |
14 cm |
0.75in |
20mm |
| Toner 4-pk |
6.99 |
Small |
no |
3/4 in |
20 mm |
4 1/4in |
10.8 cm |
.3125in |
8mm |
| Weir: |
3.95 |
Large |
yes |
1 1/4 in |
35 mm |
5 1/2in |
14 cm |
0.4375in |
12mm |
| |
|
|
|
|
|
|
|
|
|
With thanks to Carolyn910, BeadSmith, and Sally Battis for providing some details. And BeadSmith for written permission to use their images.
|
| * SRP is the advertised Suggested Retail Price – last updated 2016-March-10 – Always check your seller for most recent price. |
| ** Prior to 2015 BeadSmith SD discs has 25mm center – this do not fit the BeadSmith Handle – price used is with instruction for 8 and 16 Round Spiral (Japanese Name: Kongo Gumi ). |
| *** Sally Battis disc has a beveled center opening on the bottom. As a result, although the same Center hole ID on top/numbered side, it likely will not support the BeadSmith handle. |
Comments, additional details, questions, corrections always welcomed
If you would like to see the line of BeadSmith Disc for Braiding
visit our e-store by clicking here to see our products and pricing
September 1st, 2015 at 04:42 am »
Comments (0)I cannot emphasize how thankful I am to Anita Clark – I tend to write “as if we were in the same room and having a conversation”
With her help – this version has better grammar, several errors corrected and still, I think, retains the flavor.
Combined with the Fill the Gap Set Up & Movements.pdf – these are likely all you need and perhaps even more than you wanted to know about this easy and versatile braid.
You may download these complimentary files in our Facebook Group by joining us at:
Braids Beaded Kumihimo & More
Note: I am not trained as a graphic artist – so far all have been able to use the diagrams to make the braid. It may not be prettified, but it is apparently functional.
Enjoy The Making
Wheat